1. Why scalp exfoliation is the key to healthy hair
Your hair can only be as healthy as its foundation - the scalp. Regular scalp exfoliation is the key to vital, shiny hair and can revolutionize your hair care routine. But why exactly is it so important?
removal of deposits
Over time, sebum, dead skin cells and product residue build up on your scalp. This buildup can clog hair follicles and hinder hair growth. A scalp scrub gently removes this residue and creates a clean foundation for healthy hair growth.
Improved blood circulation
The massaging movements when applying a scalp scrub stimulate blood circulation. Better blood circulation means more nutrients can reach the hair roots. The result? Stronger hair and possibly even accelerated hair growth.
regulation of sebum production
A scalp scrub can help regulate your scalp's natural sebum production. Too much sebum can lead to oily hair, while too little can cause dry, brittle hair. By exfoliating regularly, you can find the right balance for your scalp.
Studies show that a healthy scalp can lead to 28% thicker hair. By incorporating a scalp scrub into your routine, you are not only investing in your current hair health, but also in the future growth and vitality of your hair.
More effective hair care products
A clean scalp can absorb care products better. After exfoliation, shampoos, conditioners and other treatments can penetrate deeper and develop their full effect. You will notice that your usual products suddenly work much more effectively.
Scalp peeling is not just a trend, but a proven method for healthier hair. It is the first step to the gorgeous hair you have always dreamed of. In the following sections, you will learn how to make the most of this powerful tool.
2. The 3 best DIY recipes for an effective scalp peeling
You don't have to dig deep into your pockets to do something good for your scalp. You can make effective peelings yourself using ingredients from your kitchen. Here are three simple but effective recipes for your scalp peeling:
1. Sugar-olive oil peeling
This gentle scrub combines the exfoliating effect of sugar with the nourishing properties of olive oil.
- 2 tablespoons brown sugar
- 2 tablespoons olive oil
- 5 drops of tea tree oil (optional for additional antibacterial effect)
Mix all ingredients into a paste. Massage gently into your damp scalp and rinse thoroughly.
2. Sea salt and lemon peeling
Sea salt cleanses deeply, while lemon provides a kick of freshness and regulates excess oil.
- 2 tablespoons fine sea salt
- 2 tablespoons freshly squeezed lemon juice
- 1 tablespoon coconut oil
Mix the ingredients and gently apply to your scalp. Leave the scrub on for 5 minutes before rinsing.
3. Honey-Apple Cider Vinegar Scrub
Honey has a moisturizing effect, while apple cider vinegar balances the pH of the scalp.
- 2 tablespoons honey
- 2 tablespoons apple cider vinegar
- 1 teaspoon coconut oil
Warm the mixture slightly to make it more pliable. Apply it to your scalp, massage gently and rinse thoroughly after 10 minutes.
Important information on use
When using DIY peels, you should keep a few things in mind:
- Always test the peeling on a small area of skin first to rule out allergic reactions.
- Do not use the peelings more than once a week to avoid over-stimulating your scalp.
- Make sure to rinse the peels thoroughly so that no residue remains.
- Adjust the amount of ingredients to your hair length and density.
These natural scrubs are a cost-effective and effective way to do something good for your scalp. Experiment with the recipes and find out which one suits you best. Your hair will thank you for the extra care!
3. How to use scalp peelings correctly: step-by-step instructions
Proper use of your scalp scrub is crucial for optimal results. Follow these step-by-step instructions to get the most out of your scrub:
Preparation
Before you start peeling, it is important to prepare your hair and scalp:
- Brush your hair thoroughly to loosen knots and remove loose flakes.
- Wet your hair and scalp with lukewarm water. The scrub will be most effective on damp skin.
applying the peeling
Now it's time to get down to business:
- Divide your hair into sections to make it easier to reach your scalp.
- Take a small amount of the scrub and apply it directly to the scalp.
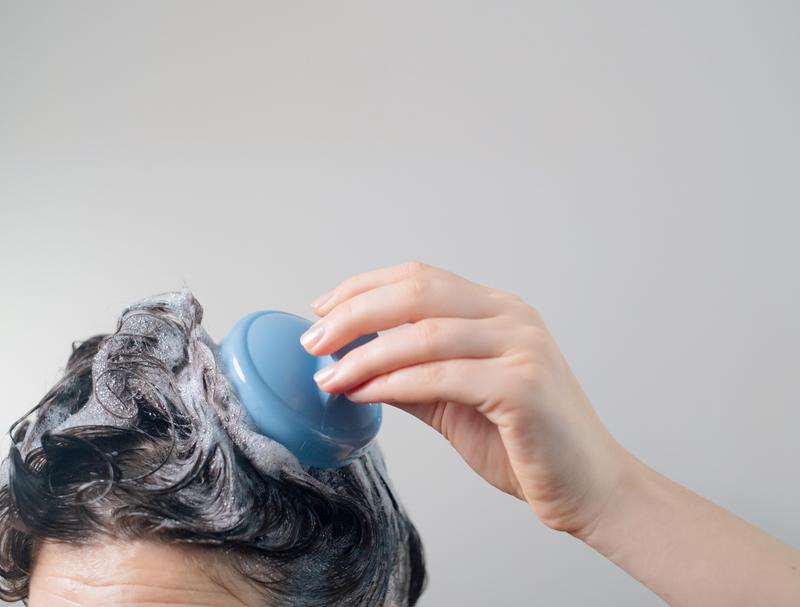
- Massage the scrub in with gentle, circular movements. Use your fingertips, not your fingernails.
- Work section by section until you have treated the entire scalp.
The right massage technique
A good massage is the key to an effective peeling:
- Apply gentle but noticeable pressure.
- Move your fingertips in small circles.
- Pay special attention to areas that are prone to flaking or oiliness.
- Massage for about 3-5 minutes to stimulate blood circulation.
exposure time and rinsing
After the massage:
- Leave the peeling on for 5-10 minutes, depending on the product or recipe.
- Rinse your hair and scalp thoroughly with lukewarm water.
- Be sure to remove all peeling residue to avoid irritation.
follow-up treatment
To care for your scalp after peeling:
- Wash your hair with a mild shampoo to remove any remaining residue.
- Use a light conditioner, but only on the lengths and ends.
- Dry your hair gently with a towel without rubbing.
Please note that your scalp may be particularly sensitive after peeling. Avoid direct sunlight for the next 24 hours and do not use aggressive hair styling products.
With these instructions, your scalp peeling will become a relaxing and effective ritual for healthy, vital hair. Enjoy the process and the results!
4. Frequency and timing: When should you do your scalp peeling?
The right frequency and timing for your scalp exfoliation can make a big difference in its effectiveness. Here's how to find the perfect rhythm for your individual hair care routine.
The ideal frequency
The frequency of your scalp exfoliation depends on several factors:
- For normal to oily scalp: 1-2 times per week
- For dry or sensitive scalp: Every 1-2 weeks
- For dandruff: Start with once a week and adjust the frequency as needed
Observe how your scalp reacts and adjust the frequency accordingly. Exfoliating too often can disrupt the scalp's natural protective barrier.
The best time
Choose the time for your peeling strategically:
- Before shampooing: This helps to loosen deposits and optimally prepares the scalp for cleansing.
- In the evening: Your scalp has time to regenerate overnight.
- On days without important appointments: If your hair looks or feels different after peeling.
Seasonal adjustments
Your scalp has different needs in different seasons:
season | Recommendation |
---|---|
Summer | More frequent exfoliation to remove sweat and sunscreen residue |
winter | Gentler and less frequent peeling to protect the scalp from drying out |
Special situations
In certain cases you should adjust the frequency:
- After intense exercise: An additional peeling can help remove sweat and deposits.
- Before coloring your hair: Exfoliating 2-3 days beforehand can make the color more even.
- After using styling products: Exfoliating more frequently helps remove product residue.
Listen to your body
The most important thing is to pay attention to the signals your scalp is giving you. If you notice itching, redness or increased sebum production, adjust your exfoliation routine accordingly. Every scalp is unique, so experiment until you find your perfect rhythm.
With the right frequency and timing, your scalp exfoliation will become an effective tool for healthy, radiant hair. Be patient and consistent - the results will be worth it!
5. Be careful with sensitive scalp: What you need to pay attention to
A sensitive scalp requires special attention and care. If you are prone to irritation, redness or itching, it is important to be careful when exfoliating your scalp. Here you will find out what you should pay attention to in order to protect your sensitive scalp and still benefit from exfoliation.
Choose gentle ingredients
For sensitive scalps, choosing the right ingredients is crucial:
- Prefer natural, mild exfolians such as finely ground oatmeal or rice bran.
- Avoid harsh chemicals and strong fragrances.
- Look for soothing ingredients like aloe vera or chamomile.
Perform patch test
Before applying a new peeling to your entire scalp, always do a patch test:
- Apply a small amount of the scrub behind your ear.
- Wait 24 hours and observe if any reactions occur.
- Only if no irritation occurs, use the peeling on the entire scalp.
Gentle application
The type of application is particularly important for sensitive scalps:
- Massage the scrub in very gently without applying too much pressure.
- Reduce the exposure time to a maximum of 2-3 minutes.
- Rinse the scrub thoroughly with lukewarm (not hot) water.
Reduced frequency
Less is often more for sensitive scalps:
- Start by exfoliating every 2-3 weeks.
- Observe how your scalp reacts and adjust the frequency accordingly.
- Avoid exfoliating if your scalp is stressed or irritated.
Don't forget aftercare
The care after the peeling is just as important as the peeling itself:
- Use a mild, pH-neutral conditioner.
- Apply a soothing scalp lotion, such as panthenol or niacinamide.
- Avoid heat styling and direct sunlight for the next 24 hours.
Pay attention to warning signals
Look for the following signs that indicate that the peeling may be too intense for your scalp:
- Persistent redness or swelling
- Increased itching or burning
- flaking or dryness
- Increased sebum production as a reaction
If these symptoms occur, stop peeling and consult a dermatologist if necessary.
With the right care and attention, even sensitive scalps can benefit from a gentle peeling. Listen to the needs of your scalp and adjust your routine accordingly. This way, you can find a healthy balance between cleansing and protection and pave the way to a well-cared-for, vital scalp.